


Warm a small amount between your palms until it turns smooth, then work it through damp or dry hair from roots to ends, depending on the finish you want. Shape with your fingers for texture or a comb for a cleaner line. Hair clay stays workable, so you can restyle it by hand hours later without touching the tub again.
TL;DR:
- Applying warm clay evenly through damp or dry hair enhances texture and control, with damp application promoting a more even spread.
- Short to medium textured styles respond best to clay, especially on straight, fine, or slightly coarse hair, which needs extra grip and volume.
- Using a small amount—pea to quarter-sized—based on hair length and thickness prevents buildup and ensures natural, matte results.
- Clay remains reworkable all day, allowing reshaping with water and fingertips without adding more product or washing hair.
- Proper warming of the clay between palms before application is essential to avoid patchy coverage and achieve a smooth, consistent finish.
What Is Hair Clay and When Does It Work Best?
Hair clay gives you a matte finish with medium to strong hold, unlike pomade’s shine or wax’s greasy grip. It grips individual strands instead of coating hair in a film, which is why it builds texture and volume instead of weighing hair down.
Short to medium hair with some texture responds best. Think crops, textured fringes, and short sides with more length on top. Straight, fine hair benefits too, since clay adds grip that fine strands often lack. People choose clay because it looks natural, never wet or plastic, and it lets you rework your style all day instead of locking it in place at 7 a.m. and hoping it survives.
Prepping Your Hair and Product Before You Style
Damp or dry hair both work, but they give you different results. Some stylists prefer starting on towel-dried, damp hair because moisture helps the clay spread evenly and gives you more control while you shape. Bone-dry hair, on the other hand, tends to produce a stronger, more matte finish, which matters if you want maximum texture with zero shine.
Keep a few basics on hand before you start:
- A towel to blot hair to “damp,” not soaking wet
- A spritz bottle if your hair dries out fast between applications
- A hair dryer for setting your shape once you’re done
- A fine comb for sharp lines, a wide comb for looser texture
Warming the clay matters as much as picking damp versus dry. Scoop it out and rub it between your palms for several seconds until it turns soft and glossy. Skipping this step is one of the most common reasons clay goes on patchy.
Step-by-Step: How to Apply Hair Clay
Once your hair is prepped and your product is warm, the actual application takes less than a minute. Follow this order every time and you’ll get consistent results.
- Scoop a starter amount. Start small, roughly a pea to dime size for short hair.
- Warm and emulsify. Rub the clay between your palms until it’s smooth, never clumpy or grainy.
- Apply to sides and back first. Working these areas before the crown locks in hold where you need structure, then lets you move forward for even distribution.
- Work through the top. Distribute from roots to ends, lifting as you go to build volume instead of flattening hair against your scalp.
- Shape with fingers or a comb. Fingers give texture and separation; a comb gives you a sharper, more defined line.
- Set with a blow-dryer if you want extra hold. A low, cool setting locks the shape without frying your hair.
Pro Tip: If your style looks a little matte for your taste, rub a dot of light pomade between your palms and smooth it over the top only. You keep clay’s texture underneath and add a touch of shine where people actually see it.
This sequence mirrors what most barbers do behind the chair, and it works because it’s methodical, not because it’s complicated.
How Much Hair Clay Should You Actually Use?
Guessing at amounts is the fastest way to end up with a stiff, gummy mess. Length and thickness determine your starting point, and you can always add more, but you can never take product back out once it’s in.
- Short hair (buzzed to 1 inch): a pea-sized amount is usually plenty
- Short to medium hair (1 to 3 inches): start with a dime-sized scoop
- Medium hair (3 inches and up): work with a nickel to quarter-sized amount, applied in sections
Hair type changes the math too. Coarse or thick hair soaks up more product and can handle a slightly larger starting scoop. Fine hair needs less. A little clay goes a long way on fine strands, and over-applying is what makes fine hair look weighed down or greasy instead of textured. If you’re using hair clay for thin hair, start at the low end of every range above and add in small increments only if you need more hold.
Restyling and Fixing Your Look Throughout the Day
Clay’s biggest advantage over gel is that it stays reworkable long after application. You don’t need a fresh scoop every time your hair shifts.
If a section flattens, lightly dampen your fingertips and reshape the area directly. Water helps reactivate the clay for restyling without extra product. For frizz or flyaways, a light touch with slightly damp fingers usually tames them in seconds.
Use your fingers when you want to preserve natural texture and movement. Reach for a comb only when you need a sharper part or a more polished line, since combing tends to smooth out the separation that makes clay styles look effortless in the first place.
Washing Clay Out and Keeping Hair Healthy
Clay typically rinses clean with your regular shampoo. If you notice a dull, coated feeling after a few days of daily use, switch to a clarifying shampoo once a week to clear any buildup at the roots.
Because clay has a matte, sometimes drying finish, pair it with conditioner after every wash. A weekly deep conditioning mask helps offset dryness if you’re styling most days. Keep layers light rather than heavy, and rinse thoroughly each time. Buildup, not the clay itself, is usually what causes scalp irritation or dull strands over time.
Common Hair Clay Mistakes and How to Fix Them
Most bad results trace back to the same handful of errors, and all of them are fixable.
- Applying clay straight from the tub without warming it. This causes clumping and patchy coverage instead of a smooth spread.
- Using too much product at once. Start small; you can layer more, but you cannot remove excess without washing it out.
- Applying to soaking wet hair. This dilutes hold and makes the finish greasy instead of matte.
- Only coating the surface. Work clay into the roots, not just the top layer, or your hold won’t last.
If your first attempt clumps, rinse and start over with a smaller amount and a longer warm-up between your palms. Give yourself two or three tries to find your personal amount and technique. Every head of hair takes to clay a little differently.
Why Moose’s Tallow Built a Hair Clay Around Real Ingredients
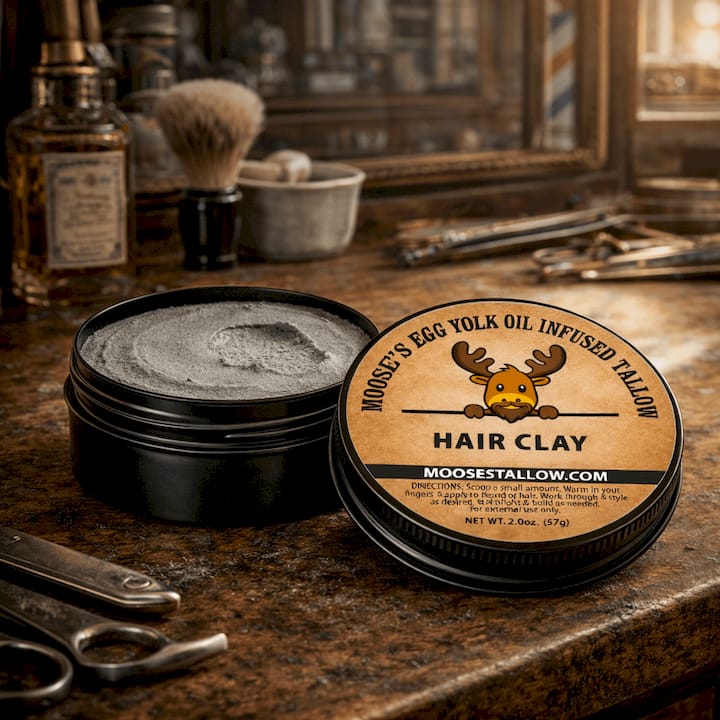
Brian “Moose” Smith started this brand after reading his old lotion label and counting 52 ingredients. Our hair clay follows the same rule: beef suet tallow as the base, fractionated coconut oil for stable texture, beeswax for hold, vitamin E, and egg yolk infused oil for conditioning. No filler, nothing you can’t pronounce.
— Brian Smith
Try Tallow Hair Clay With Egg Yolk Oil
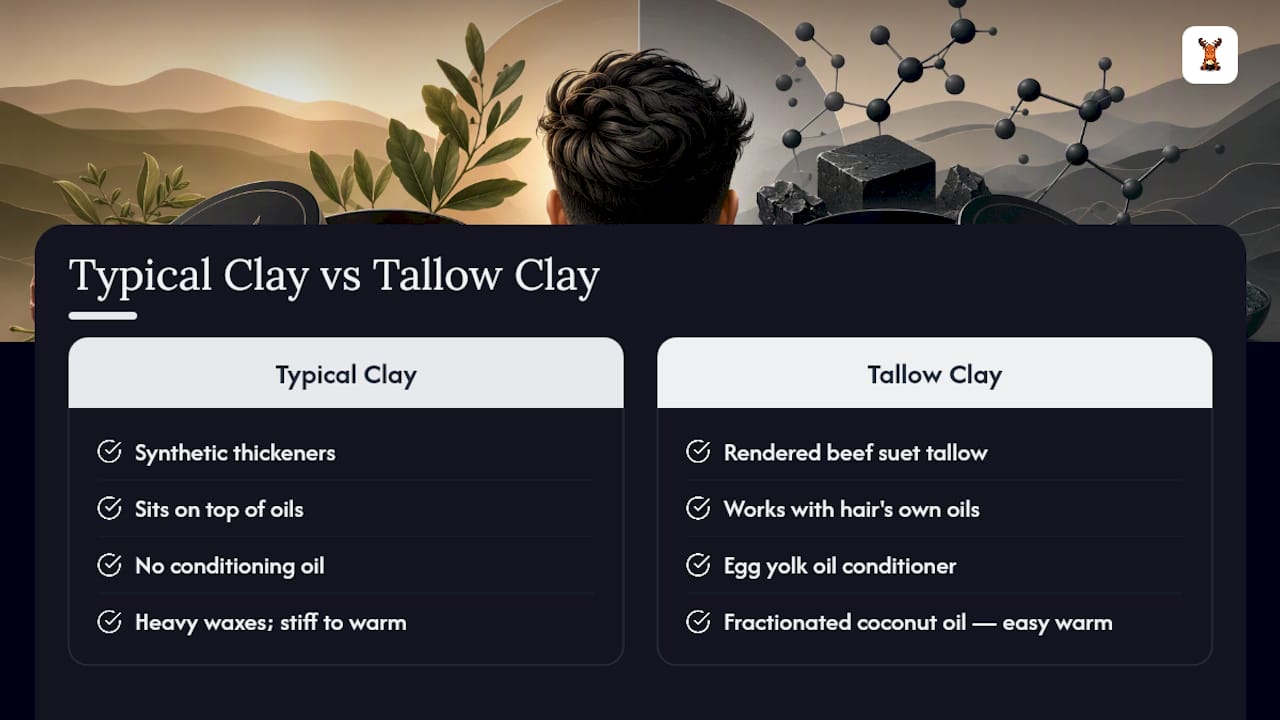
Most clays lean on synthetic thickeners and heavy waxes that build up fast and dry hair out over time. Tallow Hair Clay infused with Egg Yolk Oil takes a different route. It’s built on properly rendered beef suet tallow instead of water and fillers, so it works with your hair’s own oils rather than sitting on top of them. Egg yolk oil adds a conditioning layer while you style, and fractionated coconut oil keeps the formula stable and easy to work between your palms, exactly the warm-up step this guide walks through.
Every batch is handmade in small runs, and orders come with a satisfaction guarantee. If you want a matte hold that doesn’t leave hair feeling stripped, grab a tub here and try the routine above with it tonight. If you’re building out a full grooming lineup, our full product collection covers beard balm, deodorant, and hand cream made with the same water-free approach.
Sources
- Everything You Need To Know About Hair Clay: In-Depth User Guide
- Hair with Clay – The Ultimate Guide to Styling and Care - TM magazine
FAQ
Do You Apply Clay to Wet or Dry Hair?
Both work, but they give different results. Damp, towel-dried hair spreads clay more evenly and gives you more control, while bone-dry hair produces a stronger, more matte finish. Never apply to soaking wet hair, since it dilutes hold and turns the finish greasy.
What Are the Downsides of Hair Clay?
Clay can dry hair out with daily heavy use, especially formulas built on alcohol or synthetic fillers. It can also clump if you skip warming it first, so always emulsify a small amount in your palms before applying.
What Do You Do With Hair Clay?
You warm a small amount in your palms, work it through roots to ends, and shape with fingers or a comb for texture and matte hold. Clay is reworkable throughout the day, so a bit of water and a quick reshape fixes flattened areas without needing more product.
When Should You Use Hair Clay?
Reach for clay when you want a natural matte finish with real texture, especially on short to medium hair or fine hair that needs extra grip. It’s a strong choice for anyone who wants to restyle by hand later in the day instead of setting hair once and leaving it alone. Tallow Hair Clay infused with Egg Yolk Oil is built for that exact routine, at $20 and up per tub.
0 comentarios